

How To Select The Right PT Wall-Mount Electrical Enclosure Size For Your Components
Oct 20, 2026
Leave a message
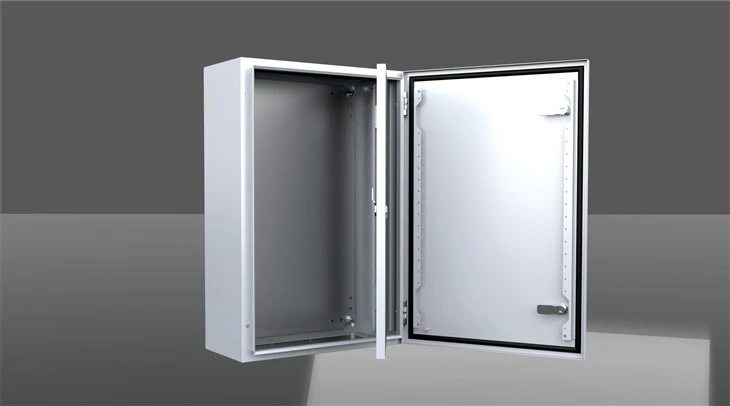
For industrial control panels, power distribution units, and automation equipment, the most suitable enclosure size is one that accommodates the complete assembly while maintaining the required electrical clearances and environmental protection. The following steps explain how to determine the appropriate dimensions before placing an order.
Identify All Components That Need to Fit Inside
Start by preparing a complete component list rather than sizing the enclosure around the largest device alone. The final arrangement may include electrical equipment, mounting hardware, cable management accessories, and other parts that occupy internal space.
Typical components include:
Circuit breakers and contactors: Check their mounting dimensions, terminal positions, and required electrical clearances.
PLC modules and control relays: Allow room for wiring connections, signal cables, and access to removable modules.
Power supplies and transformers: Consider their physical dimensions and heat generation during operation.
Terminal blocks and wiring ducts: Reserve space for cable routing, conductor bending, and terminal maintenance.
Cable glands and connectors: Account for the space required where cables enter the enclosure and connect to internal terminals.
Use manufacturer datasheets to obtain actual component dimensions. Include accessories such as mounting brackets and connector plugs whenever they affect the installed footprint.
Determine the Required Internal Mounting Area
After identifying the components, arrange them on a preliminary layout. This helps establish the minimum usable mounting area before selecting the enclosure's external dimensions.
For a wall-mounted enclosure, width and height usually determine the available mounting area, while depth affects component installation, wiring access, and the clearance behind the door.
| Dimension | What to Consider |
|---|---|
| Width | Component rows, horizontal wiring ducts, terminal groups, and side clearances |
| Height | Vertical component arrangement, cable routing, and space for top and bottom entries |
| Depth | Component projection, cable bending, door-mounted devices, and rear clearance |
| Mounting plate | Usable area after accounting for mounting holes, edges, and structural features |
The external enclosure dimensions are not the same as the usable internal dimensions. Door construction, enclosure walls, mounting plate position, and internal accessories can reduce the available space.
Practical tip: Prepare a dimensioned mounting layout and verify that every component can be installed without obstructing adjacent equipment or the cable routing area.
Allow Space for Wiring and Future Maintenance
An enclosure should accommodate both the installed components and the wiring needed to connect them. Dense component placement may appear space-saving on paper, but it can make assembly, inspection, and troubleshooting more difficult.
Pay particular attention to three areas:
Cable bending space: Power cables and larger conductors may require more bending room than small signal wires. Follow the cable manufacturer's bending-radius recommendations and the requirements of the applicable electrical installation standards.
Wiring ducts and terminal access: Reserve space for wire ducts between component rows and around terminal groups. Leave enough access to tighten terminals, trace conductors, and replace modules where necessary.
Maintenance clearance: Consider how technicians will remove components, disconnect cables, and use tools inside the enclosure. Components that require frequent servicing should not be blocked by other devices or tightly packed wiring.
Future expansion should also be considered. If additional relays, terminals, or communication modules are expected, include the anticipated equipment in the initial layout rather than relying on unused space that may not be accessible.
Check Installation Conditions and Thermal Requirements
The required enclosure size also depends on the installation environment and the heat generated by the electrical assembly.
Measure the available wall area and confirm the position of mounting holes, cable conduits, and nearby equipment. Check whether the enclosure door can open fully without hitting a wall, machine, or adjacent cabinet.
The mounting surface must also support the enclosure's total weight, including installed components and cables. Larger enclosures may require additional mounting support depending on the wall construction and installation method.
Circuit breakers, power supplies, variable-frequency drives, transformers, and other electrical devices can generate heat during operation. Their combined heat output, ambient temperature, enclosure material, and ventilation arrangement influence the required thermal design.
A larger enclosure may provide more internal air volume and surface area, but it does not automatically solve overheating. Depending on the calculated heat load, the design may require ventilation, filtered fans, heat exchangers, or air-conditioning equipment.
For outdoor or dusty installations, any cooling arrangement must also be compatible with the specified ingress protection requirements.
Select the Appropriate Enclosure Material and IP Rating
Once the approximate dimensions are established, choose a material and protection level suitable for the installation environment.
| Installation Condition | Selection Consideration |
|---|---|
| Indoor industrial control | Painted steel enclosures may suit general equipment protection requirements |
| Wet or washdown areas | Stainless steel or another suitable material may be required, together with an appropriate sealing design |
| Corrosive environments | Evaluate material compatibility, coating performance, and exposure to specific chemicals |
| Outdoor installations | Consider rain exposure, sunlight, temperature variation, and cable-entry sealing |
| Dust-prone locations | Specify an IP rating suitable for the expected dust exposure and verify the complete enclosure configuration |
An IP rating addresses protection against solid objects and water under defined test conditions. It does not independently establish corrosion resistance, UV resistance, or suitability for every outdoor environment.
The required rating should be determined from the actual operating conditions and verified against the manufacturer's documentation for the selected enclosure model.
Use a Practical Sizing Checklist Before Ordering
Before confirming the PT wall-mount electrical enclosure size, review the following information with the enclosure manufacturer:
- Overall component dimensions and quantities
- Required internal mounting plate dimensions
- Component spacing and electrical clearances
- Wiring duct widths and cable bending requirements
- Cable entry positions and gland plate requirements
- Door-mounted devices, handles, and locking arrangements
- Heat dissipation requirements and ambient operating temperature
- Material, surface finish, and required IP rating
- Available wall space and mounting method
- Allowance for planned additions or future maintenance
Providing a component list and layout drawing is generally more useful than specifying only an external width, height, and depth. It allows the manufacturer to assess whether the proposed enclosure can accommodate the complete assembly.
Customized PT Wall-Mount Enclosures from Prota
Anji Huacheng Electrics Co., Ltd., operating under the Prota brand, manufactures metal electrical enclosures and supports customized enclosure requirements for industrial applications. Its manufacturing capabilities include laser cutting, CNC bending, welding, and powder coating.
For PT wall-mount enclosure projects, customers can submit component layouts, 2D drawings, or 3D models for dimensional review. The enclosure design can then be assessed against mounting plate requirements, cable entry locations, door structure, material selection, surface finish, and specified ingress protection.
This drawing-based approach helps address practical installation details before production begins. For projects involving multiple component sizes or customized openings, confirming the enclosure dimensions and layout in advance also helps reduce avoidable design changes during fabrication.
Send Inquiry